
Where to Place Landscape Lighting for the Best Outdoor Results?
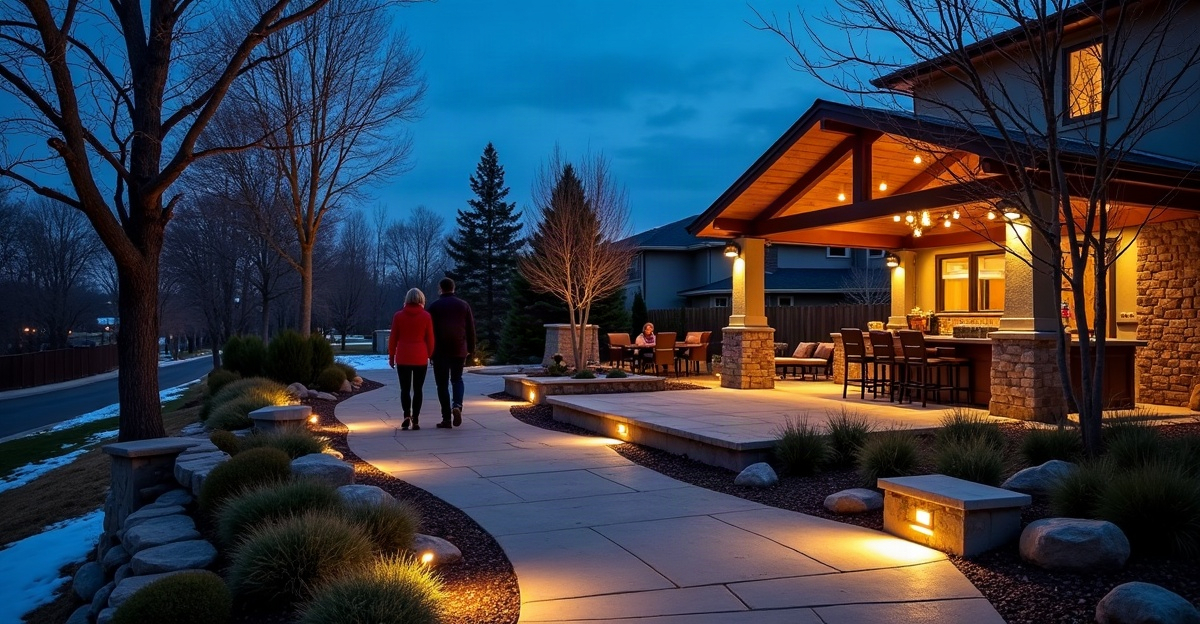
Place landscape lighting along the routes people use after dark. Prioritize paths, steps, entrances, driveways, gates, and gathering areas. Next, layer controlled accents across architecture, trees, planting beds, and focal points. This approach reduces glare, light spill, and unlit areas.
Key Takeaways
- Light walkways, stairs, grade changes, gates, driveways, and entry points first to improve visibility and access.
- Create soft, overlapping pools of light instead of using excessive brightness or placing fixtures at uniform intervals across the property.
- Use selective uplights, spotlights, and downlights to emphasize architectural details, trees, walls, and planting features.
- Align lighting with patio, deck, outdoor kitchen, pool, and seating use. Add task lighting where activities require it.
- In Idaho Falls, select weather-rated outdoor fixtures. Coordinate fixture placement with irrigation, drainage, snow storage, utilities, and maintenance access.
Start With Safety, Visibility, and the Areas People Use Most
Landscape lighting should go where it improves safe movement, defines important property features, supports outdoor activities, and creates visual balance. We do not need to install fixtures everywhere to achieve effective results.
Start by lighting the routes and spaces people use most after dark. Paths, steps, grade changes, driveways, entryways, gates, and outdoor living areas should take priority over purely decorative features. Thoughtful placement improves visibility around entrances and walkways, although lighting should not be treated as a guaranteed crime-prevention solution. Our guide to outdoor lighting safety explains how clear illumination supports safer access around a property.
The best answer to where to place landscape lighting is to use layers. Functional lighting guides movement and supports access. Accent lighting draws attention to focal points. Ambient lighting creates a comfortable atmosphere in gathering spaces. Combined correctly, these layers create a natural, intentional appearance.
Brighter does not always mean better. Too many fixtures or excessively bright bulbs can cause glare, harsh shadows, light trespass, wasted energy, and an unattractive nighttime view. We aim for overlapping pools of soft light with minimal dark gaps instead of uniformly bright surfaces.
Light Walkways, Garden Paths, Stairs, and Driveways First
Place path lights along walkway and garden-path edges to guide movement without making the route resemble a runway. Focus on path edges, doorways, gates, grade changes, and transitions between patios, driveways, and other hardscape surfaces.
Step and deck lights work well on stairs, retaining-wall steps, deck transitions, and elevation changes where footing becomes difficult to see after dark. For wider paths, commercial walkways, and public-facing areas, bollards can provide stronger directional light while defining the route clearly.
Driveway lighting belongs at entry points, curves, turnarounds, gates, garage access, and pedestrian crossings. Each fixture should direct light down and away from drivers’ eyes, streets, and neighboring properties. Low-profile fixtures, shielding, and careful aiming help maintain visibility without creating glare.
Fixture spacing depends on several site-specific factors. Lumen output, beam angle, fixture height, mounting location, plant density, surface color, and the intended effect all affect coverage. There is no universal spacing measurement that works for every property. Instead, we assess the route at night and adjust placements until the lighting provides consistent guidance.
For parking areas, managed sites, multifamily properties, and commercial properties, focus first on clear travel routes, building access points, signs, pedestrian transitions, gates, and high-use common areas. Coordinating lighting with hardscape features also helps us illuminate stairs, walls, patios, and walkways in a cohesive way.
Place Landscape Lighting on the House and Around Entrances With Care
Where to place landscape lighting on a house depends on the architecture, access points, and features worth emphasizing. Begin at the front entrance, garage access, service doors, gates, and other daily entry points. Wall lights and sconces make arrivals, visitors, deliveries, and routine access easier to manage after dark.
Within foundation beds, selective spotlights and uplights can add depth to columns, stonework, brick details, façade features, and large architectural focal points. Well lights provide a discreet in-ground option for uplighting trees, walls, and façade elements when the location has adequate drainage.
Avoid lining every fixture in a straight row along the foundation. That approach often creates a flat wash of light and can make a home appear overlit. We place fixtures selectively to create contrast, visual balance, and depth.
Careful aiming matters as much as fixture selection. Light should not spill into windows, create glare for people approaching the home, or shine toward the street. For more placement concepts, our residential lighting design ideas show how architectural and landscape features can work together after dark.
Extend Usable Light to Patios, Decks, and Outdoor Gathering Areas
Patios, decks, pergolas, pools, seating areas, and outdoor kitchens need lighting based on how each space functions after sunset. A dining patio needs soft ambient light that allows conversation without shining into guests’ eyes. An outdoor kitchen needs focused task light near grills, counters, gates, and service areas.
Deck and step lights improve visibility along railings, stairs, and transitions between the house, deck, patio, and yard. Downlights mounted in mature trees, pergolas, or architectural structures can create a natural moonlighting effect over gathering spaces and nearby paths.
Pool and water-feature lighting requires restraint. Prioritize safe navigation around surrounding hardscape, steps, and seating areas. Avoid aiming fixtures where glare reflects off the water or interferes with comfortable sightlines.
Well-planned backyard lighting ideas extend the hours we can use outdoor spaces while keeping the setting relaxed. The goal is enough light for movement, dining, and conversation without making seating areas feel exposed or overly bright.
Highlight Trees, Planting Beds, Retaining Walls, and Landscape Focal Points
After we cover safety and activity areas, accent lighting can bring the property’s strongest features into view. Trees, shrubs, specimen plants, retaining walls, water features, signs, stonework, and planting beds can all benefit from focused illumination.
Spotlights and uplights work well for vertical accents, columns, trees, signs, and stone details. Narrow beams suit smaller features and tall vertical elements. Broader beams work better for canopy trees, wide walls, and larger landscape elements. Downlights in mature trees or elevated mounting points add depth and soft illumination below without exposing the fixture itself.
Path lights can define planting-bed edges when they also help people move through the property. We do not use them simply to fill every open area. Each fixture should have a purpose and contribute to the overall nighttime composition.
Aim light at the feature, never at windows, seating areas, streets, drivers, or adjacent properties. Daytime placement can look correct but produce glare, awkward shadows, or dark gaps after sunset. Whenever possible, we test fixture locations after dark before final installation. Our landscape lighting designer guidance covers why professional planning helps prevent these common issues.
Plan for Idaho Falls Weather, Irrigation, Maintenance, and Professional Design
Idaho Falls and Eastern Idaho properties need lighting systems that account for moisture, temperature changes, snow, and routine landscape maintenance. Choose durable, outdoor-rated fixtures and connections. Place fixtures above likely snow cover where possible, and keep them out of snow-storage zones, snowplow routes, edging paths, and areas exposed to lawn equipment or heavy foot traffic.
Coordinate fixture and wire locations with sprinkler heads, irrigation lines, drip lines, valve boxes, drainage routes, existing utilities, and future planting or hardscape changes. Good drainage is especially important around in-ground fixtures and wiring connections so they do not sit in standing water.
Low-voltage systems are common for landscape lighting, but transformer sizing, wiring runs, electrical coordination, and complex installations may require qualified professionals. We recommend planning access for fixture adjustment, cleaning, LED servicing, and seasonal maintenance from the start.
Simple Placement Checklist
Before finalizing a lighting plan, we recommend reviewing the property after dark.
- Identify how people enter and move through the property after sunset.
- Mark hazards, steps, elevation changes, and high-use areas.
- Select trees, planting beds, architectural features, and focal points worth highlighting.
- Determine where light could create glare or spill into windows.
- Locate irrigation, utilities, drainage areas, and snow-storage zones.
- Test fixture locations at night before final installation when possible.
Landscape Lighting Placement FAQs
Where should landscape lights be placed around a house?
Place them at entrances, garage access, path transitions, selected foundation beds, columns, stonework, and focal-point architectural features. Prevent glare into windows and spill toward the street.
How far apart should path lights be placed?
Spacing depends on lumen output, beam spread, mounting height, surrounding surfaces, and the desired effect. Aim for overlapping pools of soft light with minimal dark gaps.
Should landscape lights point up or down?
Use downward, shielded light for paths and activity areas. Use controlled uplighting for trees, walls, stonework, and architectural features.
Where should lights go along a driveway?
Install them at entries, curves, gates, parking transitions, garage access, and pedestrian crossings without shining toward drivers.
How many landscape lights does a front yard need?
Use only enough fixtures to safely define movement routes and highlight a few meaningful features. Avoid placing lights everywhere.
Can landscape lighting be installed around irrigation systems?
Yes. Coordinate fixtures and wire paths with sprinkler heads, irrigation lines, drip lines, valve boxes, and drainage routes.
What landscape lighting works best in snowy climates?
Use durable, outdoor-rated fixtures positioned above likely snow cover where possible and outside snow-storage, snowplow, and high-damage zones.
For complex irrigation, large outdoor spaces, electrical coordination needs, or a cohesive whole-property plan, a professional landscape lighting consultation can prevent costly adjustments later. Lawrence Landscaping Inc. provides local guidance for Idaho Falls-area property owners who want lighting that looks right, functions well, and remains practical through every season.